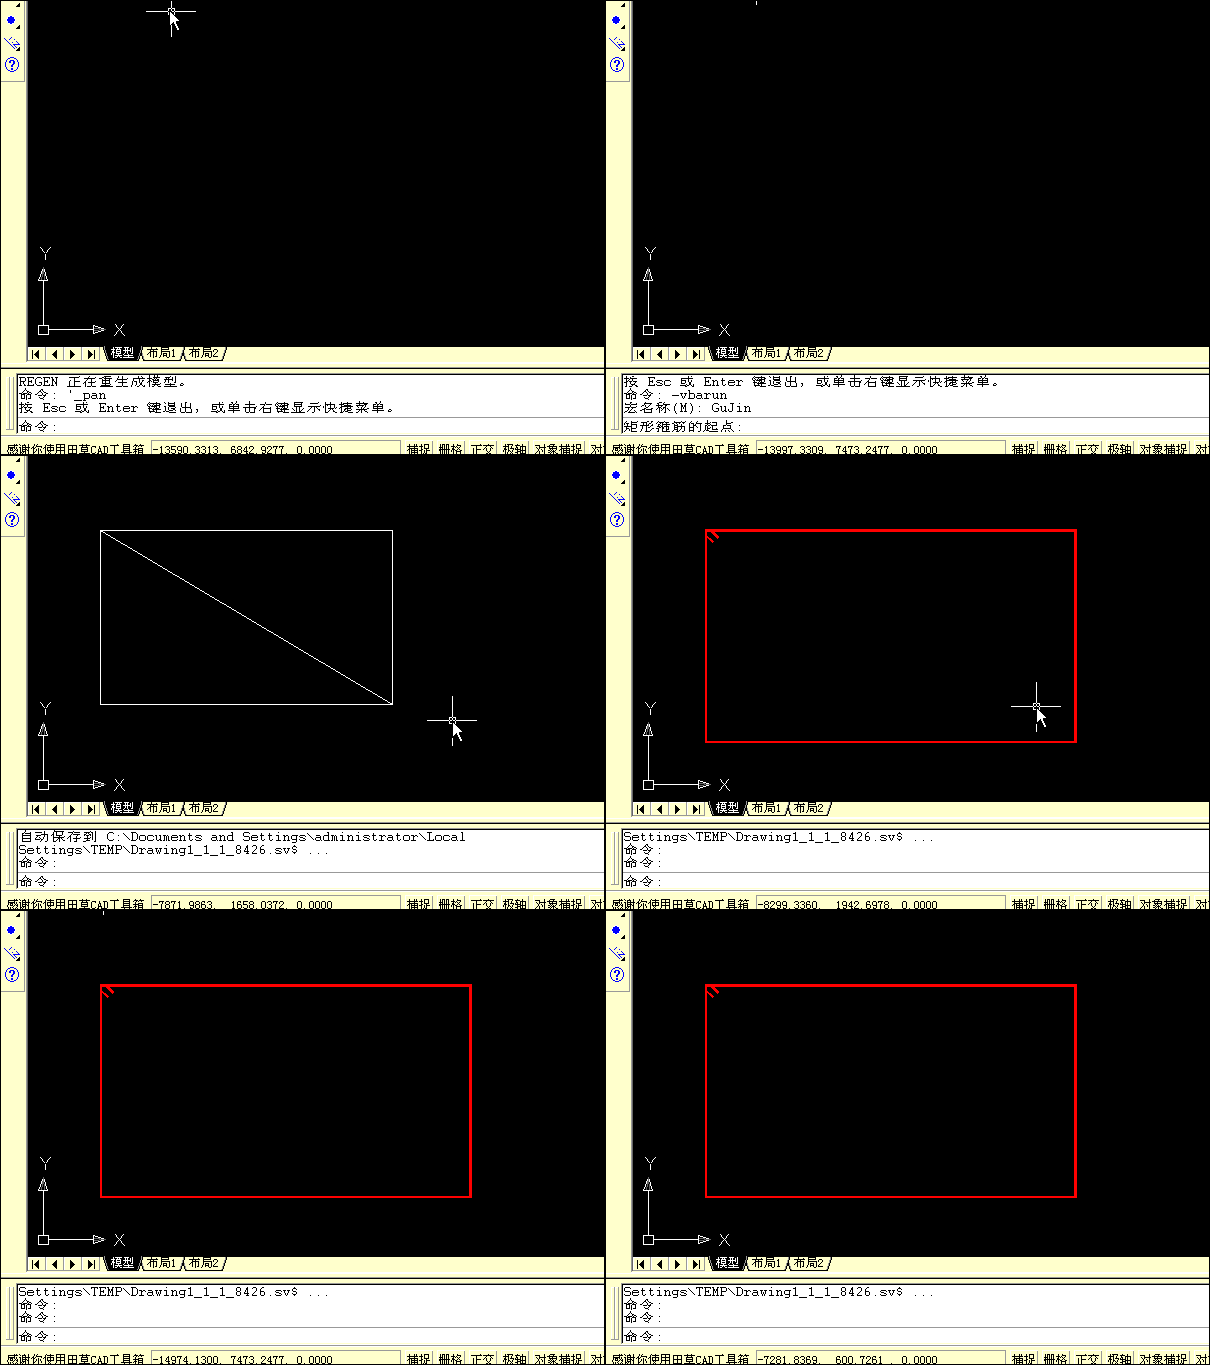
CAD VBA实现橡皮筋直线、圆
首先是计时控件,然后是实时捕捉鼠标的屏幕位置,然后是转换获得CAD当前试图鼠标所在的位置坐标,然后才是实时绘制直线或圆。
VBA中不可直接使用vb的timer控件,我们可以调用独立的xTimer控件。
控件下载:
然后是使用API函数GetCursorPos获得当前鼠标的屏幕坐标。
然后通过读取CAD系统变量viewSize荷Screensize分别得到当前试图的CAD高度和当前视口的屏幕尺寸(屏幕分辨率的像素).然后得到CAD实际尺寸和屏幕像素的比值。
精确度于鼠标的频率快慢有关系
'获取CAD坐标系统和屏幕像素的比值
Function ViewScreen() As Double
Dim ScreenSize As Variant
ScreenSize = ThisDrawing.GetVariable("screensize") '当前视口的屏幕宽度和高度
Dim H As Variant
H = ThisDrawing.GetVariable("viewsize") '当前视图图形的实际高度
ViewScreen = Abs(H / ScreenSize(1))
End Function
Public Declare Function GetCursorPos Lib "user32" (lpPoint As POINTAPI) As Long
实时获得鼠标的屏幕坐标,然后通过屏幕尺寸和cad实际尺寸的比值,计算出鼠标当前的cad坐标。
然后在基点和鼠标坐标之间绘制直线或圆。
值得注意的是,屏幕坐标的是以屏幕的左上角为原点的。而cad的世界坐标是以右下角为原点的。

[本日志由 田草 于 2007-10-05 06:57 PM 编辑]
|
|
能不能把你上面那个画矩形的代码给我发一下,十分感谢
邮箱hhg552@sina.com
邮箱hhg552@sina.com
能不能把你上面那个画矩形的代码给我发一下,十分感谢
非常感谢!
非常感谢!
'得到鼠标屏幕坐标
Private Type POINTAPI
x As Long
Y As Long
End Type
Private Declare Function GetCursorPos Lib "user32" (lpPoint As POINTAPI) As Long
Dim CAD_Point1 As Variant
Dim CAD_Point2 As Variant
Dim ScreenPoint1 As POINTAPI
Dim ScreenPoint2(1) As Long
Dim BiLi As Double
'获取CAD坐标系统和屏幕像素的比值
Function ViewScreen() As Double
Dim ScreenSize As Variant
ScreenSize = ThisDrawing.GetVariable("screensize") '当前视口的屏幕宽度和高度
Dim H As Variant
H = ThisDrawing.GetVariable("viewsize") '当前视图图形的实际高度
ViewScreen = Abs(H / ScreenSize(1))
End Function
'通过CAD坐标计算屏幕坐标
Sub GetScreenPoint()
BiLi = ViewScreen
CAD_Point1 = ThisDrawing.Utility.GetPoint(, "先指定一个点:") '获得鼠标所在位置的CAD坐标
ThisDrawing.ModelSpace.AddPoint CAD_Point1
GetCursorPos ScreenPoint1 '通过api直接获得鼠标所在位置的屏幕坐标
MsgBox "屏幕坐标:" & ScreenPoint1.x & " / " & ScreenPoint1.Y
MsgBox "对应的CAD坐标:" & CAD_Point1(0) & " / " & CAD_Point1(1)
'以上获得了CAD坐标和屏幕坐标的对应关系,下面就可以计算了
CAD_Point2 = ThisDrawing.Utility.GetPoint(CAD_Point1, "指定下一点,这个点将通过计算得到屏幕坐标:")
ScreenPoint2(0) = Int(ScreenPoint1.x + (CAD_Point2(0) - CAD_Point1(0)) / BiLi)
ScreenPoint2(1) = Int(ScreenPoint1.Y - (CAD_Point2(1) - CAD_Point1(1)) / BiLi)
MsgBox "屏幕坐标:" & ScreenPoint2(0) & " / " & ScreenPoint2(1)
'为了验证计算坐标,将CAD窗口在屏幕上移动到该点,看看效果吧。
ThisDrawing.Application.WindowState = acNorm
ThisDrawing.Application.WindowLeft = ScreenPoint2(0)
ThisDrawing.Application.WindowTop = ScreenPoint2(1)
End Sub
' 通过屏幕坐标计算CAD坐标
Sub GetCAD_Point()
BiLi = ViewScreen
CAD_Point1 = ThisDrawing.Utility.GetPoint(, "先指定一个点:") '获得鼠标所在位置的CAD坐标
ThisDrawing.ModelSpace.AddPoint CAD_Point1
GetCursorPos ScreenPoint1 '通过api直接获得鼠标所在位置的屏幕坐标
MsgBox "屏幕坐标:" & ScreenPoint1.x & " / " & ScreenPoint1.Y
MsgBox "对应的CAD坐标:" & CAD_Point1(0) & " / " & CAD_Point1(1)
'以上获得了CAD坐标和屏幕坐标的对应关系,下面就可以计算了
Dim ScreenPoint3 As POINTAPI
GetCursorPos ScreenPoint3
Dim CAD_Point3(2) As Double
'计算cad坐标
CAD_Point3(0) = CAD_Point1(0) + BiLi * (ScreenPoint3.x - ScreenPoint1.x)
CAD_Point3(1) = CAD_Point1(1) - BiLi * (ScreenPoint3.Y - ScreenPoint1.Y)
CAD_Point3(2) = 0
MsgBox "屏幕坐标:" & CAD_Point3(0) & " / " & CAD_Point3(1)
'为了验证计算坐标,将画一条直线,看看效果吧。
ThisDrawing.ModelSpace.AddLine CAD_Point1, CAD_Point3
End Sub
请问有没有cad坐标转换为windows屏幕坐标的例子,劳驾给一个好吗。邮箱:c.liu@kimoto.com.cn。多谢了。
| 发表评论 - 不要忘了输入验证码哦! |


 用户登陆
用户登陆 站点日历
站点日历 站点统计
站点统计 最新评论
最新评论 CAD VBA实现橡皮筋直线、圆 [ 日期:2007-07-28 ] [ 来自: